What are Adaptive Icons?
Per the android docs:
Android 8.0 (API level 26) introduces adaptive launcher icons, which can display a variety of shapes across different device models. For example, an adaptive launcher icon can display a circular shape on one OEM device, and display a squircle on another device. Each device OEM provides a mask, which the system then uses to render all adaptive icons with the same shape. Adaptive launcher icons are also used in shortcuts, the Settings app, sharing dialogs, and the overview screen.
There are many ways you could go about creating the assets required for an adaptive icon. We are going to look at the route using the official Android tools to generate app icons. You will need Android Studio which includes a tool called Asset Studio which does what it says. It's a tool for generating all of the image assets, for your Android applications, at the various resolutions of the devices your app will run on.
How To...
Open a project in Android Studio and in the Project Explorer pane right-click on the app directory or any of the directories inside the app directory. In the context menu that opens select New > Image Asset
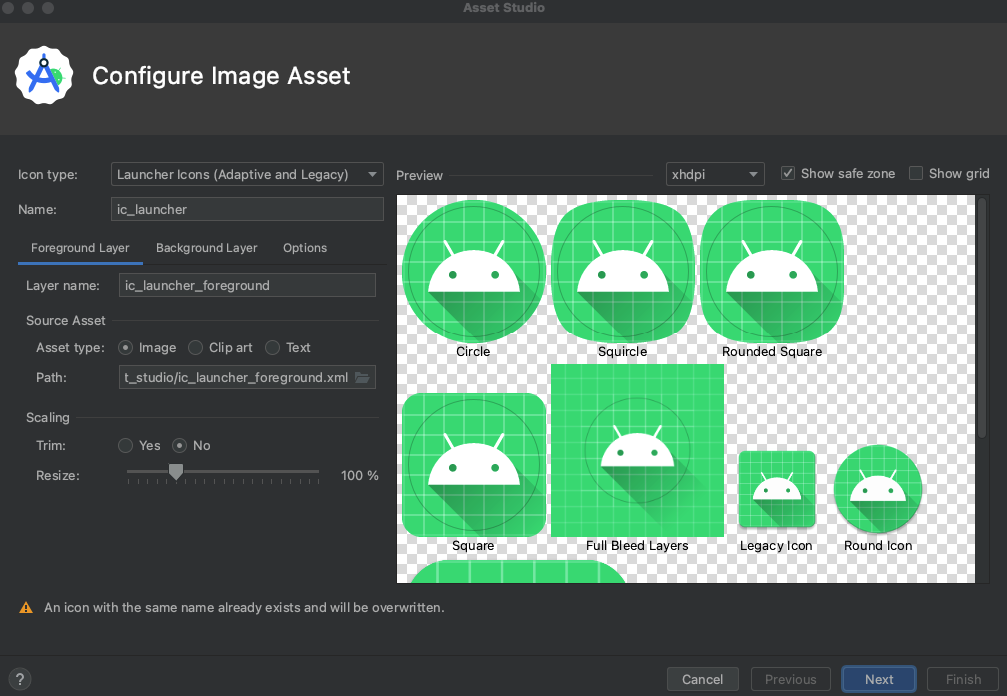
Once Asset Studio opens you'll see the new default app icon presented as seen in the following image.

The main thing to know about adaptive icons is that there are two layers, a foreground and background. The default foreground will be titled ic_launcher_foreground.xml and it is an SVG. Go ahead and click the folder button next to the path and select your app icon that you're going to use.
Now you can go ahead and set the other settings for your icon such as trim and the resize percentage. You'll also be able to change the default green background layer, select the Background Layer tab and you can repeat the same process. From experience, in a lot of cases you can use the Color radio button to set the color you'd like to use for your background layer.
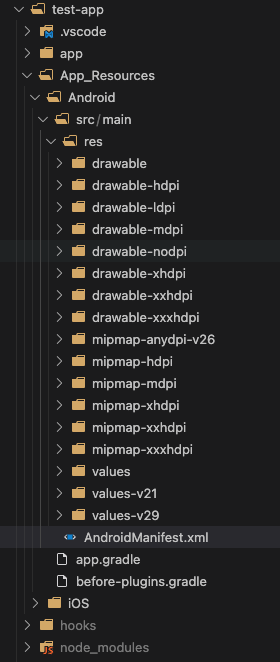
Once you are finished with your icon configuration you can complete the wizard which will generate the various resources needed for your app. The new files will be located under the android app directory in src/main/res/ where you should see several mipmap- directories.
Now we have our icon and we need to add it to our project. In this sample we are going to use a NativeScript project. This approach however is going to be generic for any framework that follows the Android application project structure for maintaining the assets for the Android application.
We are going to copy over the newly created files and directories to our project and place them inside the src/main/res/ directory of our NativeScript project. If the framework you're using does not follow the standard Android project structure that directory could be slightly different.

Conclusion
In this post, we walked through a quick approach to creating adaptive icons for our Android apps. We looked at using Android Studio's, Asset Studio which can generate all of the icons you need for your Android application. Then we copied over the newly created icon resources into a NativeScript project. Best of all, this approach can be applied to any framework or tool that creates Android applications.
