Let's poke fun at JavaScript being dead when sharing code between Web, iOS and Android apps within an Nx workspace to achieve optimal user experience targets with the following goals:
- A Web app with a 98+ PageSpeed score
- An iOS and Android app with natural platform "looks and feels" representing the best of what each respective platform is capable of.
We aim to share code to make our development process consistent and efficient to build this Maxi Ferreira and Addy Osmani inspired example for their amazing "Death by JavaScript" series:
Source code: https://github.com/NathanWalker/nx-javascriptisdead
With multiple deployment targets, Nx is a first class workspace tool for our team to do this. Let's build!
Prepare our workspace
npx create-nx-workspace@latestWe'll answer the prompts with the following:
? Where would you like to create your workspace? › dead

? Which stack do you want to use?
None:  Configures a TypeScript/JavaScript project with minimal structure.

? Package-based monorepo, integrated monorepo, or standalone project?
Integrated Monorepo: Nx creates a monorepo that contains multiple projects.

? Enable distributed caching to make your CI faster
Yes I want faster builds

# After creation, we can navigate into our workspace:
cd dead
Setup desired tooling
We'll now prepare some helpful tooling to get up and running fast. We're going to use yarn for package management to help our workspace dependencies. We'll make sure we have yarn globally installed:
npm install -g yarnInit deadly JavaScript
We're going to be driving our workspace primarily with TypeScript so let's initialize it with:
yarn nx g @nx/js:initCreate a Web app
Let's start by creating our web experience.
We'll setup an Analog powered web app! Let's install the tools:
yarn add @analogjs/platform --devNow we can create the app:
yarn nx g @analogjs/platform:app

? What name would you like to use for your AnalogJs app?
web-store

? Add TailwindCSS for styling? (Y/n)
true

? Add tRPC for typesafe client/server interaction? (y/N)
false
If we were setting up a backend we may opt to use tRPC but for this example we'll just setup a simple service to share.
We can now develop our web app with:
yarn nx run web-store:serveInstall cross platform tools
We know we want some flexibility with cross platform deployment options so we'll arm ourselves with xplat:
yarn add @nstudio/xplat --devAdd an iOS and Android app with NativeScript
We'll go ahead and add a NativeScript app which can share all our code to achieve all those natural mobile platform "looks and feels" we're after here.
yarn nx g @nstudio/xplat:app

? What name would you like for this app?
store

? What type of app would you like to create?
nativescript    [NativeScript app]

? In which directory should the app be generated? › apps

? Would you like to configure routing for this app? (Y/n) · true

? Which frontend framework should it use?
❯ angular        [Angular app]

? Use xplat supporting architecture? (Y/n) › true
We will opt to use "xplat supporting architecture" to share code quickly with several things already setup for us to save some time however it is purely optional.
Note
After installing tooling and generating apps, it's a good idea to run yarn clean to ensure your workspace setup is all complete with settled dependencies before developing further.
We can now develop our iOS and Android app using:
yarn nx run nativescript-store:ios

yarn nx run nativescript-store:android
Generate shared code
We are ready to build with seamless code sharing fully at our disposal.
Create a shared service
Let's start by generating a service that will drive the entire store — it will provide our images to sell! Because this will be a cross platform service shareable across our Analog web app as well as our iOS and Android apps made possible by NativeScript we can use the following generator from the xplat tooling:
yarn nx g @nstudio/angular:service deadThis will create an Angular service ready to be shared across our platform targets:
CREATE libs/xplat/core/src/lib/services/dead.service.tsThis allows us to use it easily:
import { DeadService } from '@dead/xplat/core'The import path has meaning in that it tells us:
@dead: it's part of our workspace scopexplat: it's part of cross platform code sharingcore: it's considered a core piece of functionality in our workspace architecture
It's implementation can be defined as follows:
import { Injectable } from '@angular/core'
import { isNativeScript } from '@dead/xplat/utils'

@Injectable({
  providedIn: 'root',
})
export class DeadService {
  imageBaseUrl = `https://deathbyjavascript.com/img`

  get images() {
    return Array.from(
      { length: 225 },
      (x, i) => `${this.imageBaseUrl}/${i}.${isNativeScript() ? 'jpg' : 'webp'}`
    )
  }
}
This is a simple service that will return the full set of 225 "Death by JavaScript" images for view data binding usage.
We'll see a built-in xplat utility coming in handy allowing us to conditionally use .jpg images for optimized display on mobile platforms vs. .webp on the web.
Data bind our views
With a data service now ready for our usage, let's bind our views to use it.
Web data binding views
We can setup the predefined analog-welcome.component to use our service:
import { Component, inject } from '@angular/core'
import { CommonModule, NgOptimizedImage } from '@angular/common'
import { DeadService } from '@dead/xplat/core'

@Component({
  selector: 'dead-store',
  standalone: true,
  imports: [CommonModule, NgOptimizedImage],
  host: {
    class: 'grid grid-cols-4 gap-2 p-4 bg-[#f7f5ee]',
  },
  template: `
    <div *ngFor="let image of deadService.images">
      <img
        [alt]="image"
        [ngSrc]="image"
        width="300"
        height="300"
        class="rounded-lg duration-300 ease-in-out hover:scale-95"
      />
    </div>
  `,
})
export class AnalogWelcomeComponent {
  deadService = inject(DeadService)
}
This takes advantage of NgOptimizedImage for image handling.
iOS and Android data binding views
To handle multi-column layout with our collection views on iOS and Android, we'll use @nativescript-community/ui-collectionview and for nice image handling, we'll use @triniwiz/nativescript-image-cache-it so we can prepare by installing the plugins at the root of our workspace:
yarn add @nativescript-community/ui-collectionview @triniwiz/nativescript-image-cache-it -WFor NativeScript dependencies, we also want to ensure the respective iOS and Android platform modules are included so we'll ensure we adjust apps/nativescript-store/package.json as follows:
"dependencies": {
  "@nativescript-community/ui-collectionview": "*",
  "@triniwiz/nativescript-image-cache-it": "*"
This will allow yarn to share these dependencies with our entire workspace so we can use it throughout shared code (eg, in libs as well as apps). It also informs the NativeScript CLI to build the platform dependencies into the respective iOS and Android deployment targets.
Note
Using "*" within NativeScript package.json dependencies inside a workspace is a good strategy when using latest versions in the root package.json. When using specific versions (like when pinning or using prerelease next, alpha, beta, rc tagged versions) you'll want to match the version between root package and NativeScript package.json.
We can now setup the predefined home.component to use our service:
import { Component, inject } from '@angular/core'
import { ObservableArray } from '@nativescript/core'
import { CollectionViewItemEventData } from '@nativescript-community/ui-collectionview'
import { DeadService } from '@dead/xplat/core'

@Component({
  template: `<ActionBar title="Nx + NativeScript with xplat" />
    <GridLayout class="pr-2">
      <CollectionView
        [items]="images"
        colWidth="50%"
        rowHeight="28%"
        scrollBarIndicatorVisible="false"
        (itemTap)="itemTap($event)"
        iosOverflowSafeArea="true"
      >
        <ng-template let-image="item">
          <GridLayout class="pl-2 pt-2">
            <ImageCacheIt
              [src]="image"
              transition="fade"
              stretch="aspectFill"
              class="h-full w-full rounded-lg"
            />
          </GridLayout>
        </ng-template>
      </CollectionView>
    </GridLayout> `,
})
export class HomeComponent {
  deadService = inject(DeadService)
  images = new ObservableArray(this.deadService.images)
}
We notably bind our CollectionView to an ObservableArray using our deadService.images. This optimizes the CollectionView with it's data source.
Generate a detail view
We want to allow the user to select an image to view it larger. We can use our workspace code generators to scaffold the setup quickly.
Web creation of a detail route
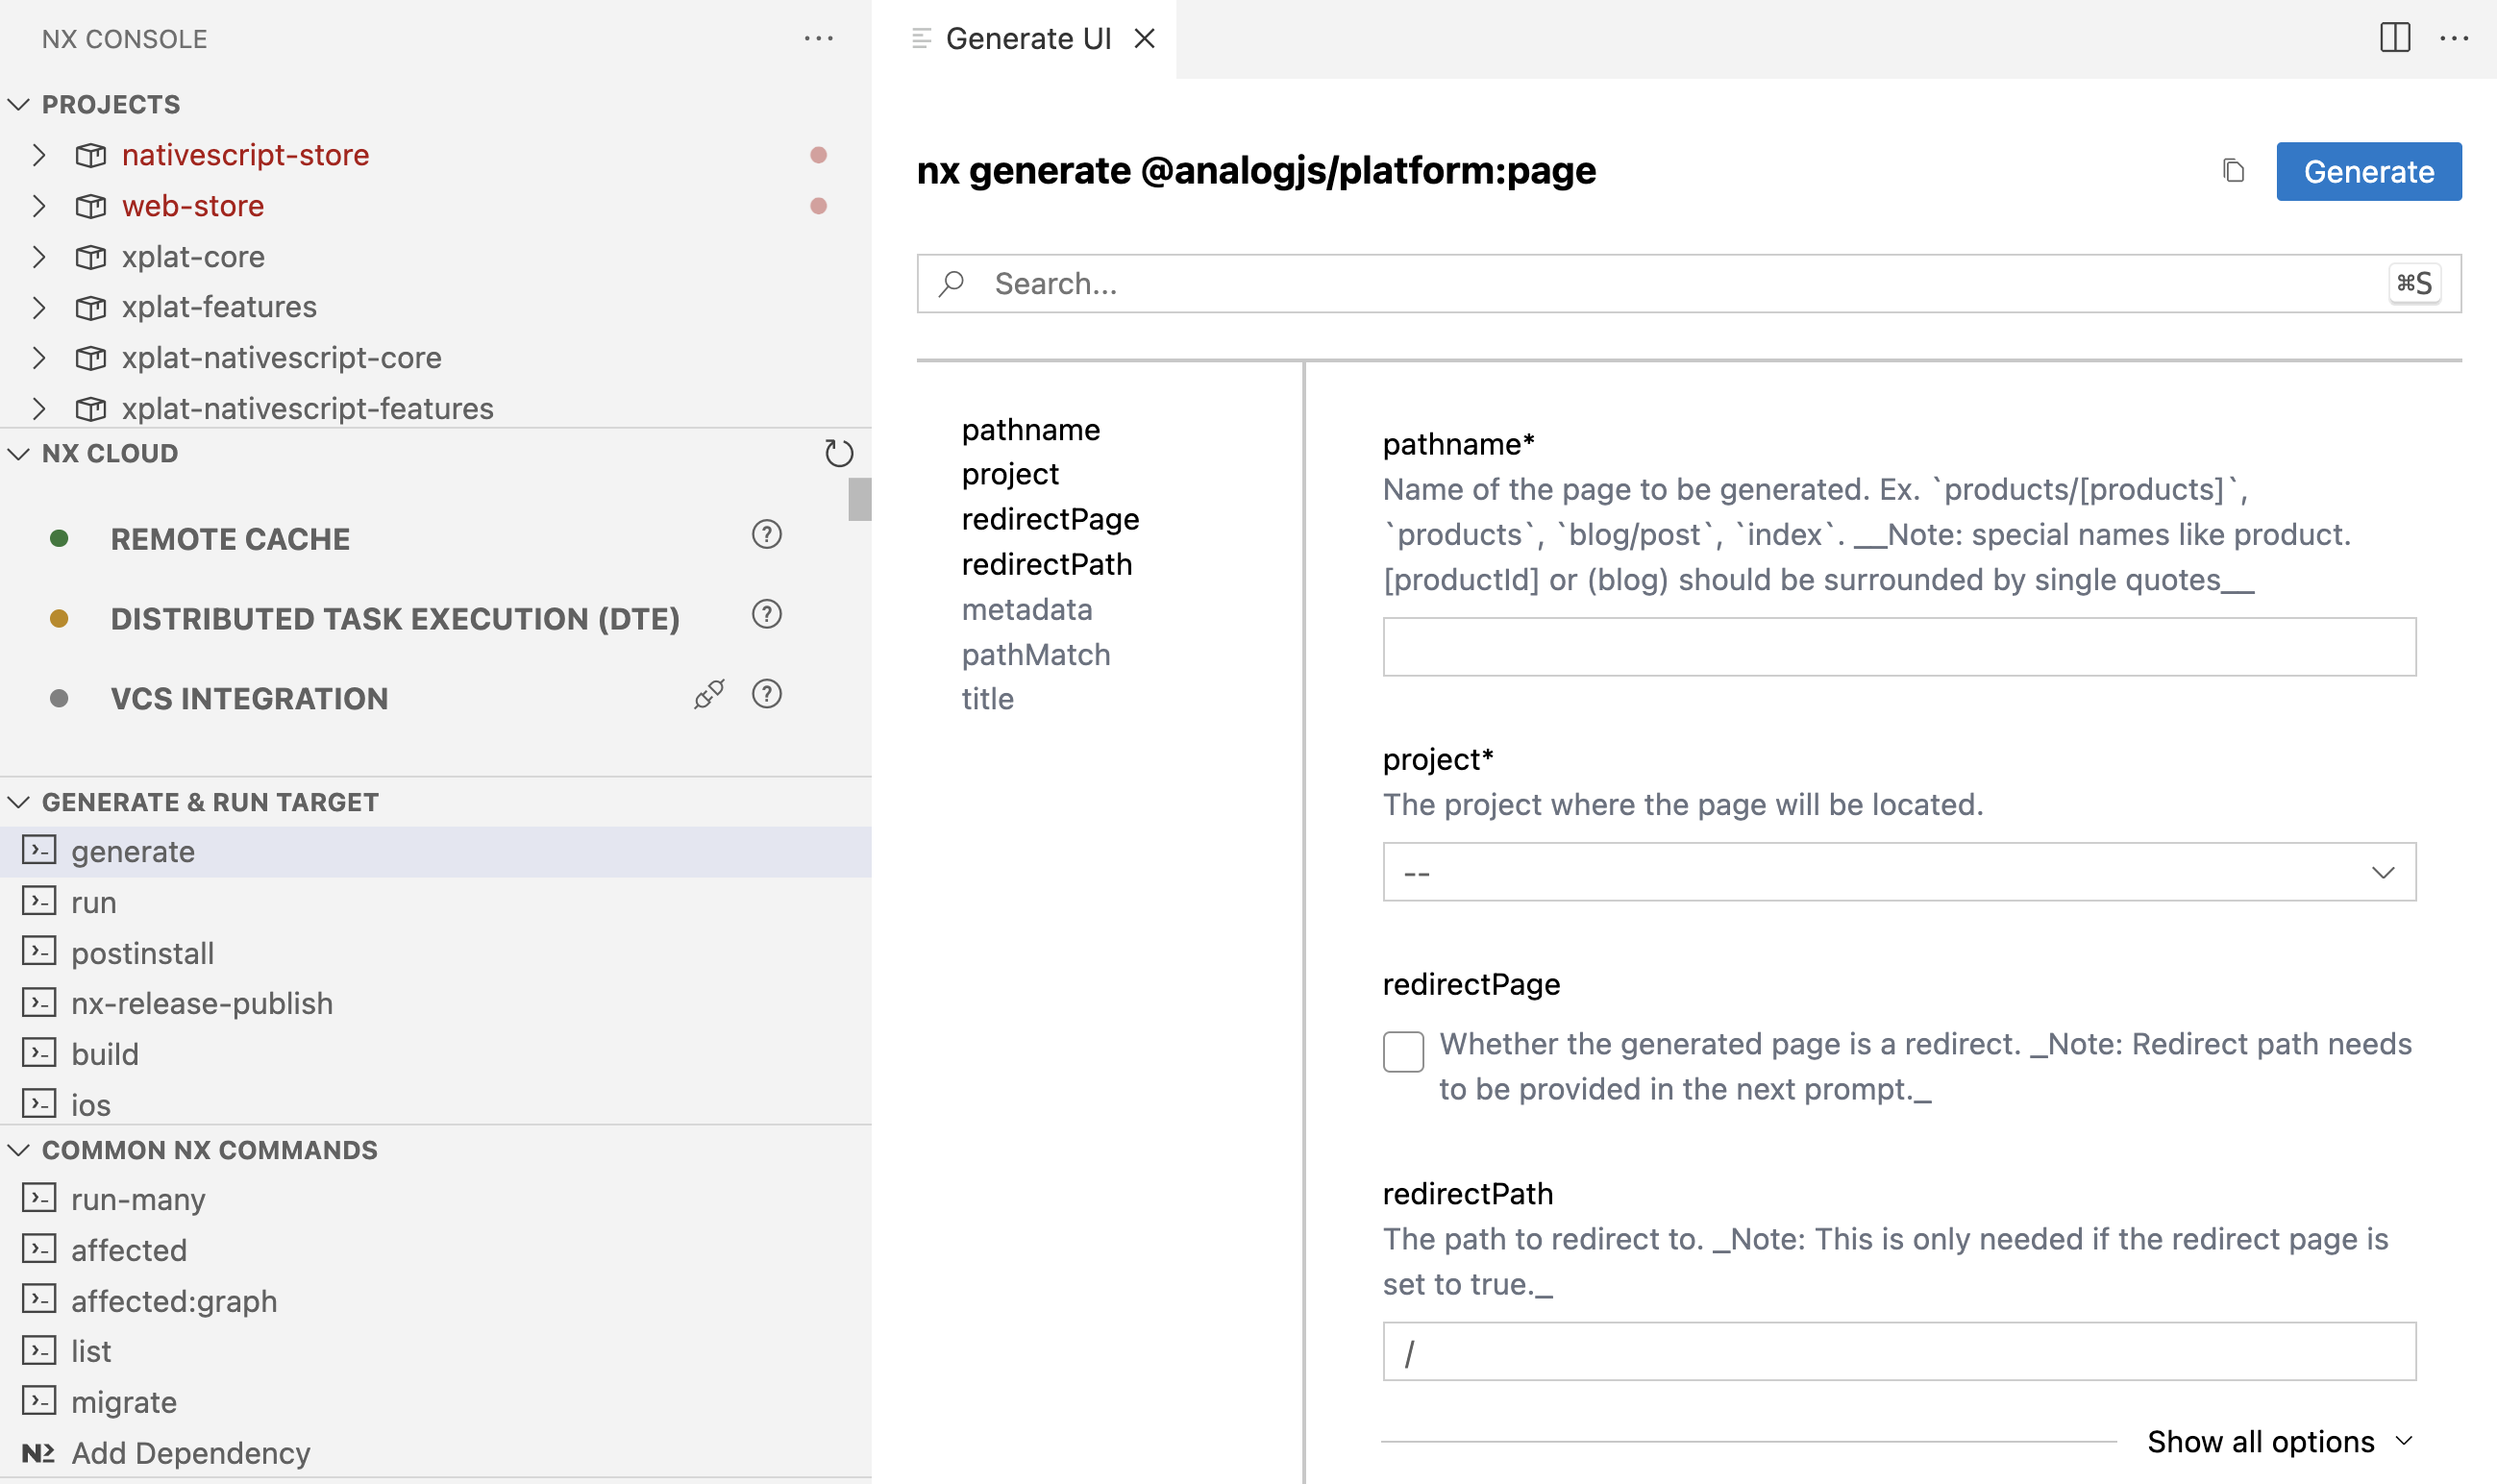
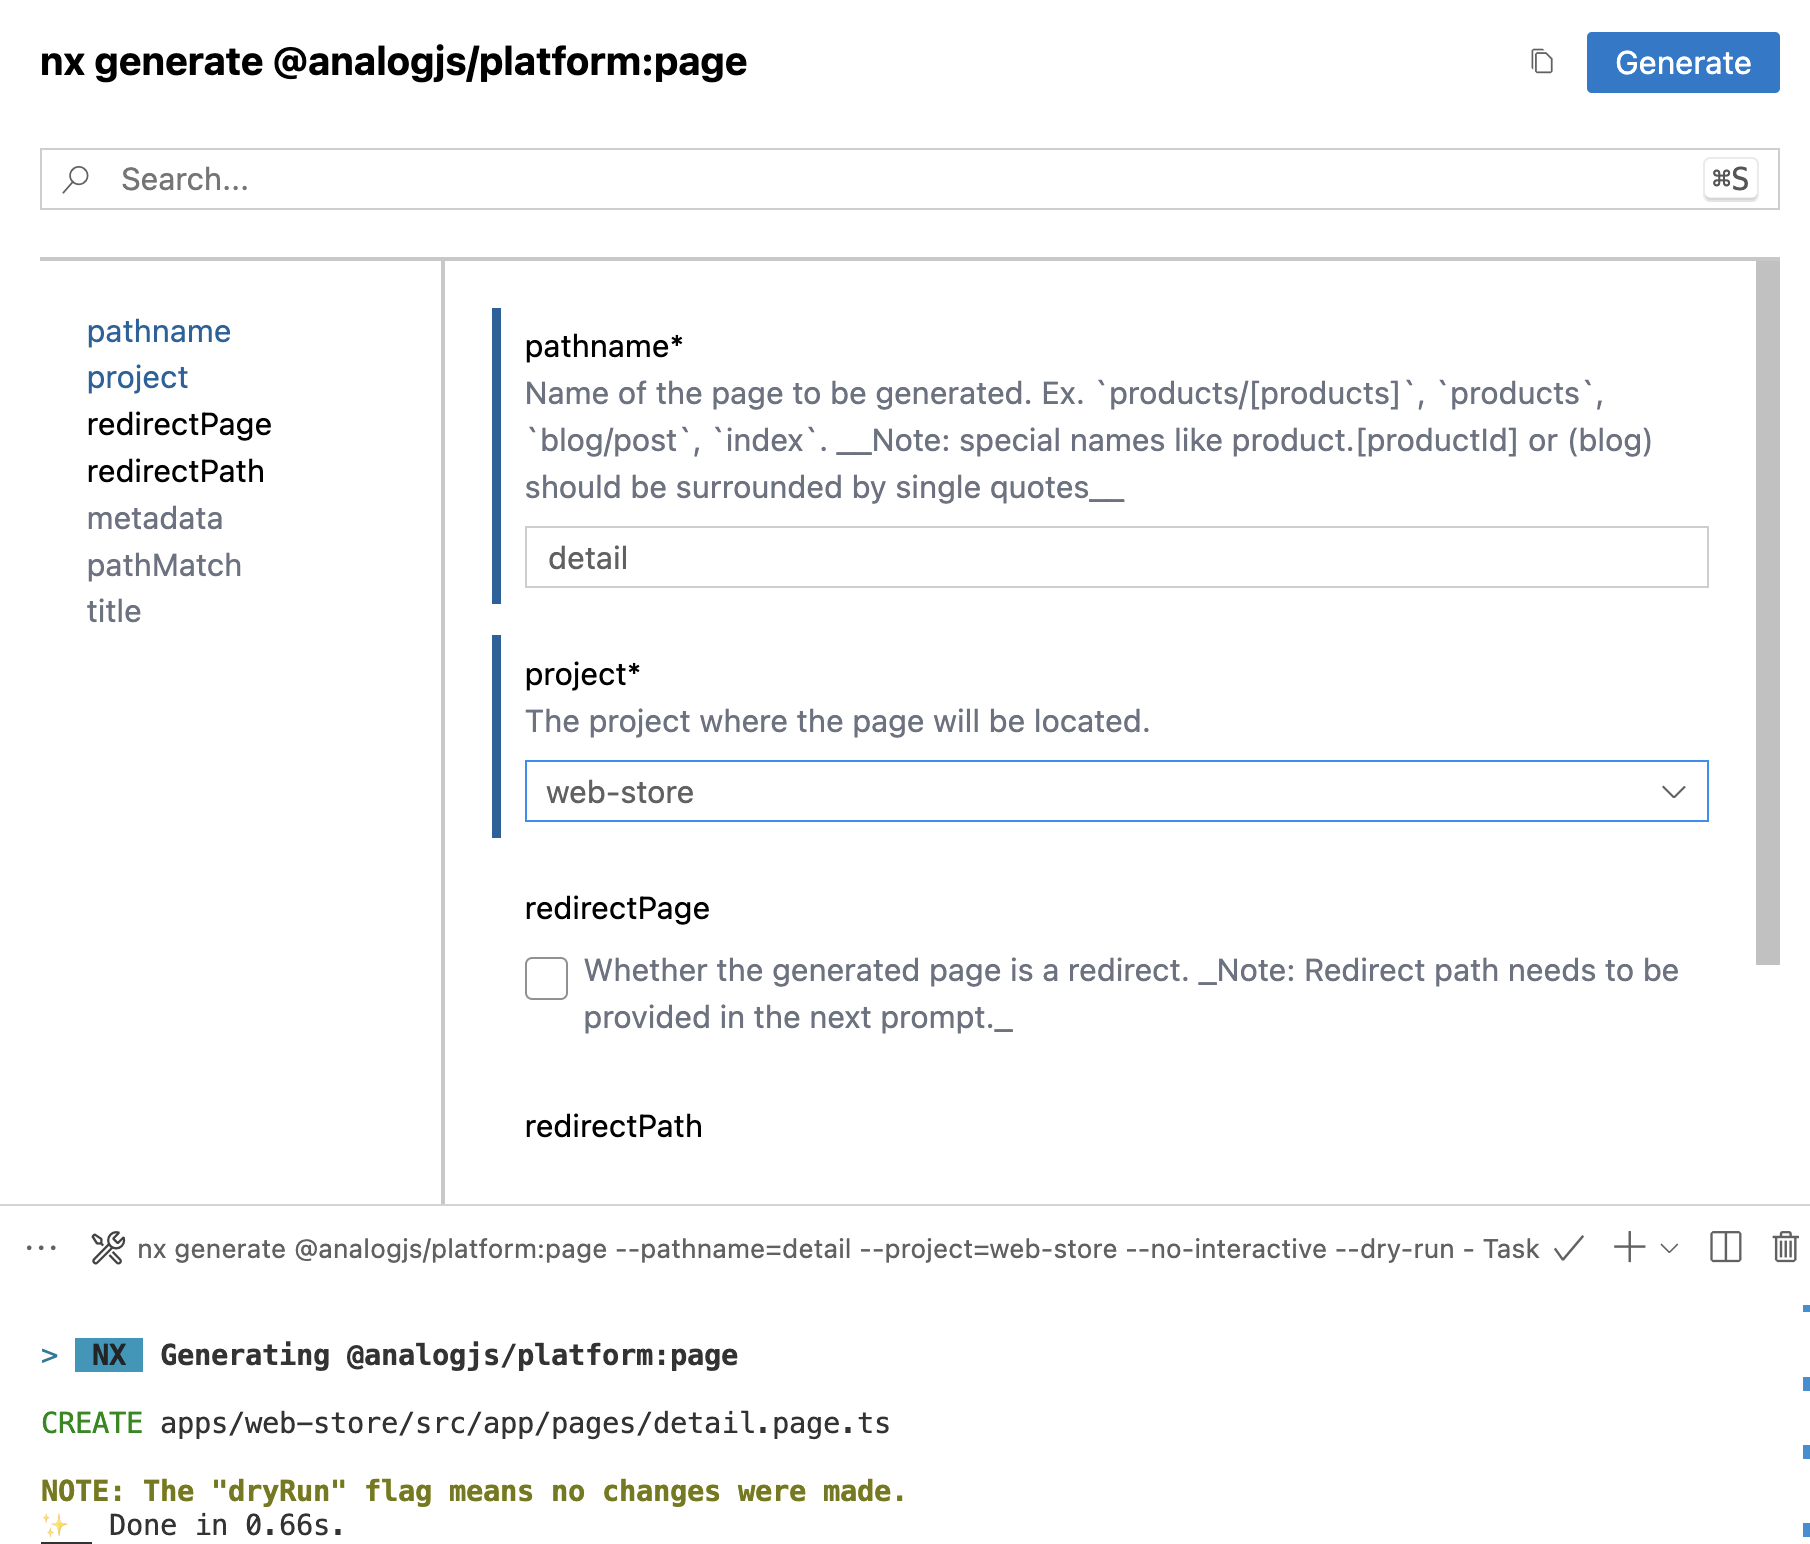
We can use the VS Code extension Nx Console to browse generators in our workspace. For the web route generation we can use Analog's generators:
yarn nx g @analogjs/platform:page --pathname=detail --project=web-store

We can now wire up our page navigation to view our selected image by adding routerLink on the img:
<img
  [alt]="image"
  [ngSrc]="image"
  [routerLink]="['/detail', i]"
  width="300"
  height="300"
  class="rounded-lg duration-300 ease-in-out hover:scale-95"
/>
Our new DetailComponent can be represented as follows:
@Component({
  selector: 'dead-detail',
  standalone: true,
  imports: [CommonModule, NgOptimizedImage],
  host: {
    class: 'bg-black',
  },
  template: `
    <img
      [alt]="image | async"
      [ngSrc]="image | async"
      class="h-full w-full bg-black object-contain"
      fill
      priority
    />
  `,
})
export class DetailComponent {
  deadService = inject(DeadService)
  image = inject(ActivatedRoute).params.pipe(
    take(1),
    map((p) => this.deadService.images[+p['id']])
  )
}
Once Angular 17 is released we can enable View Transitions API which will be great!
iOS and Android creation of a detail route
We can use the various code generators that come with xplat which contain a full set of NativeScript generators. Since we're using Angular, we can use @nstudio/angular to create various sections of code. To create a detail route we can use the feature generator:
yarn nx g @nstudio/angular:feature detail --onlyProject=true --projects=nativescript-store --routing=true
We can now wire up our page navigation to view our selected image.
In our HomeComponent we can navigate to this new detail route and we'll even enable some nice Shared Element Transitions:
import { RouterExtensions } from '@nativescript/angular'
// ...

export class HomeComponent {
  deadService = inject(DeadService)
  router = inject(RouterExtensions)
  images = new ObservableArray(this.deadService.images)

  itemTap(args: CollectionViewItemEventData) {
    this.router.navigate(['/detail', args.index], {
      transition: SharedTransition.custom(new PageTransition(), {
        pageStart: {
          x: 0,
          y: 0,
        },
        pageEnd: {
          duration: isAndroid ? 300 : null,
        },
        pageReturn: {
          duration: isAndroid ? 150 : null,
          x: 0,
          y: 0,
        },
      }),
    })
  }
}
On iOS, we can use the nice default spring settings by leaving duration to null whereby on Android we will use linear animation which feels nice there. We also customize the starting and return points of the detail page to customize how it appears in the transition.
For the detail page we can setup a simple image viewer that allows back navigation:
@Component({
  template: `<GridLayout class="bg-black">
    <ImageCacheIt
      [src]="image | async"
      [sharedTransitionTag]="image | async"
      transition="fade"
      stretch="aspectFit"
      class="h-full w-full rounded-lg"
    />
    <Button
      class="fa ml-2 mt-2 text-left align-top text-2xl text-white"
      (tap)="back()"
      >{{ 'fa-close' | fonticon }}</Button
    >
  </GridLayout>`,
})
export class DetailComponent {
  deadService = inject(DeadService)
  image = inject(ActivatedRoute).params.pipe(
    take(1),
    map((p) => this.deadService.images[+p['id']])
  )
  router = inject(RouterExtensions)
  page = inject(Page)

  constructor() {
    this.page.actionBarHidden = true
  }

  back() {
    this.router.back()
  }
}
We could spruce this page up by adding @triniwiz/nativescript-image-zoom as well to allow user zoom/pan on the image!
Improve consistency by sharing more code
Our detail routes have logic which can be reduced to a simple utility to share across Web, iOS and Android apps.

We can add a utility method to our xplat/core/../dead.service for that:
export function fetchDetailRouteImage() {
  const deadService = inject(DeadService)
  return inject(ActivatedRoute).params.pipe(
    take(1),
    map((p) => deadService.images[+p['id']])
  )
}
Which really simplifies our Web, iOS and Android DetailComponent to just use it from a single shareable import: import { fetchDetailRouteImage } from '@dead/xplat/core':

Code Sharing Heaven 🕊😌
Nx provides for an incredible way to work on projects with large teams or even individually. With xplat you can expand even more possibilities to realize the sky truly is the limit.
Source code example repo
Take things for a spin: https://github.com/NathanWalker/nx-javascriptisdead
Next Steps?
- Once Angular 17 is released we can enable View Transitions API which will improve the web experience a lot.
- Wire up a purchase button to buy TShirts and Sweatshirts from Maxi Ferreira and Addy Osmani for their work on the amazing Death by JavaScript
If you need help on your projects, we would be happy to help.
